Here's how I made my pom poms:
All you need is yarn, a piece of cardboard, and scissors.

Wrap yarn around a piece of cut cardboard. The wider the cardboard, the bigger the pom pom.

Wrap, wrap, wrap! Like 100 times! My thought was if my yarn looked like a square on the cardboard, my pom pom would be more symetrical.

Carefully pull it off of the cardboard, keeping it intact, and cut the string still attached to the skien.

Cut another length of yarn. Mine is probably about a foot long. Just remember, you can always trim shorter, you cannot grow longer. :)

Tie your string in a knot around the loops.

You should have two sides of loops when finished.

Start cutting the loops!
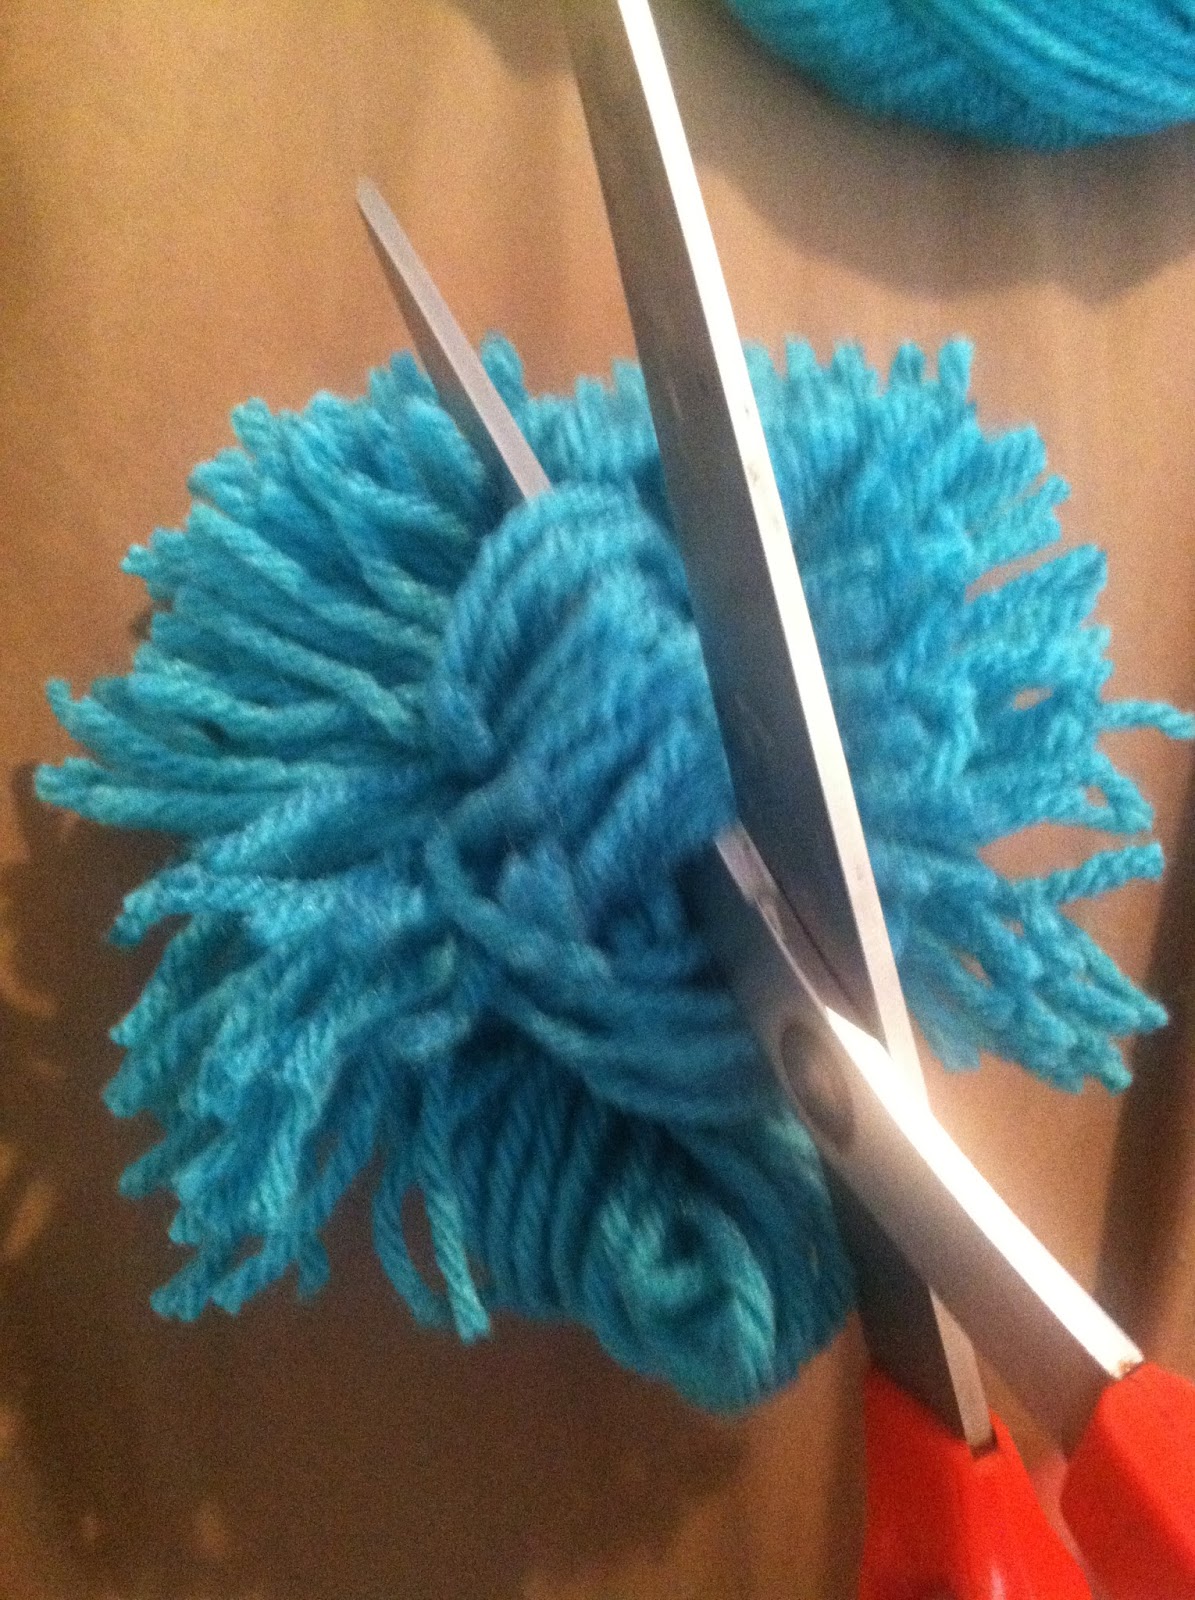
I find it easiest to cut one side of loops, then move the other side. It's easier to spot the ones you miss.

Fluff it up! I find rolling it in my hands works great. Now time to trim. While I love the look of wild haphazardness, some strands are just too long. Snip them away. Heres where you can alter: If you want more pristine poms, keep triming until all strands are the same size. They will become much smaller than when you started if you go this route. I wanted big shaggy poms, and I'm lazy, so I didn't.

Then just make how ever many you need, for the length of garland you are planning. I'm planning to place mine about a foot apart, so I made 6. This should give me at least 8 feet of garland.
So next week, after the shower, I will show you how to strand them together and the finished product! Have a great week!
UPDATE: Sorry I never got back to finish out this project. Sometimes life gets in the way. All I did to string these together to make a garland, was use a yarn needle and thread yarn through the middle of the pom. I would say, depending where you are planning to hang it, you might want to make a big knot in the place you want the pom to stay, to keep them from bunching up together. I had mine outside and the wind moved them around, wish I would've done that.
No comments:
Post a Comment